DuraPost Installation Guide A Comprehensive Guide
DuraPost installation guide provides a comprehensive overview of the process, from initial site preparation to final inspections. This guide covers various DuraPost systems and applications, offering detailed steps for each stage. Whether you’re building a fence, deck, or retaining wall, this guide ensures a successful installation.
The guide details the essential tools and materials, outlining safety precautions throughout the process. Accurate measurements and proper surface preparation are emphasized to maximize the longevity and stability of your DuraPost structure. Detailed procedures for installing posts, beams, and other components are provided, complete with anchoring techniques for different DuraPost types. The guide also covers crucial finishing touches, from sealing to painting, and includes a troubleshooting section for potential issues.
Introduction to DuraPost Installation
DuraPost is a high-performance, durable, and versatile post system designed for various outdoor applications. Commonly used for fences, retaining walls, and landscaping projects, DuraPost stands out due to its superior strength and weather resistance, making it a popular choice for long-lasting installations. Its robust construction and available customization options ensure a tailored solution for diverse needs.
DuraPost systems offer a range of options to meet specific project requirements, ensuring both aesthetics and functionality. The system’s key features include high-impact resistance, superior corrosion resistance, and exceptional dimensional stability, which results in a dependable and long-lasting installation.
DuraPost System Types
DuraPost systems are available in various configurations to cater to different project needs. This modularity allows for customized solutions, enabling adaptation to specific site conditions and design preferences. Different types often vary in dimensions, materials, and post styles to accommodate diverse aesthetic and functional requirements.
General Installation Steps
A typical DuraPost installation involves several key steps, each crucial for achieving a successful and enduring result. These steps include site preparation, post placement, anchoring, and finishing touches. Proper preparation and adherence to installation guidelines are essential for a high-quality and durable final product. The exact steps might differ slightly depending on the specific DuraPost system type and local building codes.
Tools and Materials
The following table Artikels the typical tools and materials required for a DuraPost installation project. The quantity and specific types may vary depending on the project scale and complexity.
| Tool | Description | Quantity | Notes |
|---|---|---|---|
| Post Hole Digger | Used for excavating post holes | 1-2 | Manual or power-driven; size dependent on post size |
| Measuring Tape | For accurate measurements | 1 | Ensure sufficient length for the project area |
| Level | Ensures posts are plumb | 1 | A good quality level is recommended for accuracy |
| Post Anchors | For securing posts in the ground | Variable | Quantity depends on post size and soil conditions |
| Concrete Mix | For anchoring posts | Variable | Appropriate mix for the soil type |
| Safety Glasses | Essential for eye protection | 1 per worker | Protect against flying debris |
| Gloves | Protection for hands | 1 per worker | Protect against cuts and abrasions |
| Post Hammer or Driver | For driving posts into the ground | 1-2 | Select appropriate size for the post |
| Safety Boots | For worker protection | 1 per worker | Essential for protection from sharp objects and uneven surfaces |
| Utility Knife | For cutting materials | 1 | Sharp utility knife recommended for clean cuts |
Preparation for DuraPost Installation
Proper site preparation is critical for a successful and long-lasting DuraPost installation. A well-prepared site ensures the posts are securely anchored, minimizing the risk of future movement or damage. This section details the essential steps for site preparation, highlighting the importance of accurate measurements and meticulous surface preparation.
Accurate site preparation is fundamental to the longevity and stability of your DuraPost installation. Neglecting this crucial phase can lead to costly repairs, structural issues, and a diminished lifespan of the entire project. Following the Artikeld procedures will ensure a solid foundation for your DuraPost system.
Surface Preparation
Thorough surface preparation is paramount for a secure DuraPost installation. The integrity of the foundation directly impacts the overall stability of the system. This involves removing any loose debris, vegetation, or obstacles that could interfere with proper post placement and anchoring. Compacting the soil and ensuring a level surface are equally important to achieving a strong and lasting installation.
Accurate Measurements
Precise measurements are critical for a successful DuraPost installation. Incorrect measurements can lead to misaligned posts, uneven spacing, and structural instability. Careful measurement and marking are vital for ensuring the posts are positioned correctly and the system functions as intended. A detailed measuring and marking procedure is essential to achieve accurate placement.
Measuring and Marking the Installation Area
Accurate measurements are crucial for a successful DuraPost installation. The following steps Artikel a procedure for precise measurement and marking of the installation area:
- Determine the exact location and layout of the posts. Use a measuring tape to precisely define the placement points. Consider the spacing between posts based on the DuraPost specifications.
- Mark the designated locations on the ground using stakes or spray paint. Ensure the markings are clear and visible for easy reference.
- Use a level to check the horizontal alignment of the marked points. This ensures all posts will be installed at the same elevation.
- Double-check all measurements and markings before proceeding with any excavation or other preparation activities. This will prevent costly errors.
- After finalizing the markings, photograph the marked location to confirm the placement for future reference. This will ensure no errors occur during the actual installation process.
Safety Precautions
Adhering to strict safety protocols during site preparation is essential to prevent accidents and injuries. Proper safety precautions minimize the risks associated with handling tools, materials, and equipment, promoting a safe work environment.
| Safety Precaution | Description | Why it’s important |
|---|---|---|
| Wear appropriate safety gear (gloves, eye protection, hard hat) | Protective gear safeguards against potential hazards like flying debris, dust, or sharp objects. | Prevents cuts, abrasions, eye injuries, and head injuries. |
| Use the correct tools for the task | Using the appropriate tools prevents accidents and ensures efficiency. | Improper tools can cause damage to the site or result in injuries. |
| Inspect tools before use | Ensure tools are in good working order to avoid unexpected malfunctions. | Improperly functioning tools can cause accidents and delays. |
| Maintain a clear workspace | Clear walkways and storage areas prevent tripping hazards and maintain a safe working environment. | Reduces the risk of slips, trips, and falls, ensuring worker safety. |
| Follow all local regulations | Complying with local regulations ensures adherence to safety standards and minimizes risks. | Ensures compliance with local safety standards and prevents legal issues. |
DuraPost Installation Procedures
DuraPost installations, when executed correctly, ensure structural integrity and longevity. Proper installation procedures are crucial for the long-term performance and safety of the DuraPost system. Adherence to these procedures is essential to avoid potential issues and ensure the desired structural outcome.
This section details the step-by-step procedures for installing DuraPost components, from posts and beams to other elements. It Artikels the methods for securing DuraPost to foundations or existing structures, emphasizing the importance of correct anchoring techniques for various DuraPost types. Furthermore, it explores the different types of fasteners and connections commonly used in DuraPost installations. The section concludes with potential challenges and solutions to aid in successful installations.
Post Installation
Installing DuraPost posts involves careful preparation and precise execution. Begin by ensuring the foundation is prepared according to the specifications Artikeld in the previous section. The foundation should be level and strong enough to support the weight of the post. Subsequent steps include placing the post in the prepared hole, ensuring it’s plumb, and securing it with the appropriate anchoring method. The specific anchoring technique will vary depending on the type of DuraPost and the foundation material. For concrete foundations, epoxy-based anchors or rebar may be required, while ground anchors may be more suitable for soft soil.
Beam Installation
DuraPost beam installation is a critical aspect of the overall structure. Before placing the beams, verify the posts are correctly installed and plumb. Proper alignment and leveling are paramount. Secure the beams to the posts using the specified fasteners, ensuring they are tightly fitted and adequately supported. The choice of fastener will depend on the beam type and the post material. Bolts, lag screws, or specialized DuraPost connectors are common choices.
Other Element Installation
Installing other DuraPost elements, such as railings or brackets, follows a similar approach. Ensure the supporting structure is sound and level before attaching the element. Employ appropriate fasteners for the material of the element and the supporting structure. Consider the load-bearing capacity of the elements when choosing fasteners.
Securing DuraPost to Foundation or Existing Structure
Proper anchoring is essential for the structural integrity of a DuraPost installation. The chosen anchoring method should be suitable for the specific foundation material and the type of DuraPost being installed. For example, concrete foundations may necessitate epoxy-based anchors or rebar reinforcement. In contrast, ground anchors may be better suited for softer soil types. Carefully follow the manufacturer’s instructions for the specific DuraPost model and foundation type.
Anchoring Techniques for Different DuraPost Types
The appropriate anchoring technique varies based on the type of DuraPost and the supporting structure. For DuraPost posts installed in concrete, specialized anchors, like epoxy-based anchors, are frequently used. For installations in ground, ground anchors are more suitable. Always refer to the specific DuraPost installation manual for detailed instructions.
Fasteners and Connections
Various fasteners and connections are employed during DuraPost installation. Common choices include bolts, lag screws, and specialized DuraPost connectors. The selection depends on the material of the DuraPost, the supporting structure, and the anticipated load. Select fasteners appropriate for the type of DuraPost and the foundation or existing structure.
Installation Challenges and Solutions
- Uneven Ground: Level the ground using appropriate leveling techniques before installation. This may involve adding fill material or using leveling pads.
- Incorrect Post Length: Verify the correct post length to avoid issues during installation. Measure accurately before cutting.
- Insufficient Foundation Strength: Reinforce the foundation to ensure it can support the DuraPost load. Consult a structural engineer for specific recommendations.
- Alignment Issues: Use accurate measuring tools and leveling techniques to ensure proper alignment of posts and beams. A plumb bob or laser level is helpful.
Alignment and Leveling Techniques
Precise alignment and leveling are crucial for a stable and secure DuraPost installation. Use a level and plumb bob to ensure verticality and horizontality of posts and beams. This ensures even distribution of load and prevents future issues. Precise measurements are essential to avoid misalignment. Refer to the manufacturer’s guidelines for detailed alignment and leveling procedures.
Finishing Touches and Inspections: Durapost Installation Guide
Proper finishing procedures are crucial for achieving a professional and long-lasting DuraPost installation. These procedures not only enhance the aesthetic appeal but also protect the DuraPost components from environmental factors, ensuring longevity and maintaining the structural integrity of the installation. Thorough inspection after completion is vital to ensure all aspects meet the required standards and identify any potential issues promptly.
Careful attention to sealing, painting, or staining, combined with precise finishing touches, significantly contributes to the overall quality and appearance of the project. A visually appealing and well-maintained DuraPost installation reflects positively on the project and the installer.
Sealing, Painting, or Staining Techniques
Proper sealing, painting, or staining is essential to protect DuraPost from moisture, UV rays, and other environmental elements. This extends the lifespan of the DuraPost and maintains its structural integrity. Different techniques may be employed depending on the desired aesthetic and the specific DuraPost material.
- Sealing: Sealing DuraPost components creates a protective barrier against moisture penetration. This can prevent the growth of mold or mildew, preserving the structural integrity and longevity of the components. Applying a high-quality sealant to the surface creates a durable, moisture-resistant layer.
- Painting: Painting DuraPost offers a wide range of aesthetic options. Select paints designed for exterior use are recommended for DuraPost, as these are formulated to withstand the elements. Proper preparation of the surface, including cleaning and priming, is critical to ensure a long-lasting paint finish.
- Staining: Staining DuraPost allows the natural beauty of the material to shine through while providing protection. Choose stains compatible with the specific DuraPost material. Ensure proper application techniques for a consistent and visually appealing finish. Consider the durability of the stain chosen to resist fading and damage from the elements.
Finishing Touches for a Professional Look
Implementing the right finishing touches ensures a professional and aesthetically pleasing result.
- Cleanliness: Thorough cleaning of the installation site, including removing any debris or excess sealant, paint, or stain, is crucial. A clean installation site improves the overall look and prevents future problems.
- Gap Sealing: Sealing gaps and joints between DuraPost components is essential to prevent moisture infiltration. This step enhances the durability and aesthetics of the installation.
- Fasteners: Carefully examine and, if necessary, replace or paint any exposed fasteners to maintain a consistent and finished appearance.
Common Finishing Errors and Their Impact
Improper finishing techniques can lead to a variety of problems.
- Inadequate Sealing: Insufficient sealing can lead to moisture penetration, potentially causing rot, mold growth, and structural damage to the DuraPost components. This highlights the importance of using quality sealants and following the manufacturer’s instructions carefully.
- Incorrect Paint Application: Improper painting techniques can result in uneven coats, brush marks, or premature paint failure. This emphasizes the need for proper preparation, technique, and the selection of appropriate paints for exterior use.
- Poor Stain Application: Inconsistent stain application can lead to uneven coloring and potential damage. This reinforces the importance of following the manufacturer’s instructions and ensuring proper mixing and application techniques.
Inspection Process After DuraPost Installation
A thorough inspection after DuraPost installation ensures that the project meets the required standards and identifies any potential issues early.
| Inspection Point | Description | Acceptable Condition |
|---|---|---|
| DuraPost Components | Visual inspection for damage, cracks, or other defects. | No visible damage or defects. |
| Sealants/Paints/Stains | Check for proper application, evenness, and coverage. | Even application, full coverage, no visible gaps or imperfections. |
| Fasteners | Ensure proper installation, tightness, and absence of corrosion. | Fasteners are secure, tight, and free from rust or corrosion. |
| Gaps and Joints | Examine for gaps or voids between components. | No gaps or voids; all joints properly sealed. |
| General Cleanliness | Check for debris, excess sealant/paint/stain, and any other dirt. | Clean and free from debris, excess materials, or dirt. |
Troubleshooting and Maintenance
Proper DuraPost installation is crucial, but ongoing maintenance is equally vital for ensuring the longevity and structural integrity of your DuraPost system. This section details potential problems, solutions, and preventive maintenance strategies to maximize the lifespan of your DuraPost structures.
Understanding potential issues and their resolutions allows for proactive maintenance, preventing costly repairs and extending the structural life of your DuraPost.
Common Installation Problems
Common issues during DuraPost installations stem primarily from inadequate preparation or incorrect procedures. Incorrect hole depth, inadequate concrete preparation, or insufficient anchoring can lead to instability and structural compromise. Failure to adhere to specified installation depths and spacing for posts can also lead to problems. Misaligned posts or inadequate support structures are further causes of instability.
- Incorrect hole depth: Ensure the drilled holes meet the specified depth requirements. Insufficient depth can compromise the structural integrity of the post. Use a depth gauge or marking tool to confirm the correct depth, and re-drill if necessary.
- Inadequate concrete preparation: Proper concrete mix and compaction are essential. Poor concrete preparation can lead to uneven settling and compromised structural support. Use the recommended concrete mix ratio and ensure proper compaction around the post base.
- Insufficient anchoring: Use the recommended anchoring system and ensure sufficient anchoring to prevent post movement or slippage. Use appropriate anchors and install them according to the manufacturer’s instructions.
- Misaligned posts: Use a level and straightedge to ensure posts are plumb and aligned. Proper alignment is critical for structural stability and aesthetic appeal.
- Inadequate support structures: Ensure that beams or other support structures are properly sized and installed to distribute the load evenly. Adequate support prevents bowing or sagging of the structure.
Importance of Proper Maintenance
Regular maintenance significantly extends the lifespan of DuraPost structures. This involves proactive measures to address potential issues before they escalate into significant problems. Maintaining the structural integrity of your DuraPost system safeguards your investment and ensures long-term performance.
- Preventing Deterioration: Addressing signs of deterioration early minimizes the risk of structural failure and prevents further damage.
- Extending Lifespan: Implementing preventative maintenance strategies ensures that the DuraPost system remains in optimal condition for its intended lifespan.
- Minimizing Repairs: Proactive maintenance significantly reduces the need for costly repairs, saving time and money.
Preventative Maintenance Steps
A proactive approach to maintenance is key to maximizing the lifespan of DuraPost structures. These steps help to prevent potential problems and maintain optimal structural integrity.
- Regular Inspections: Conduct periodic visual inspections for any signs of damage, settling, or movement. Pay close attention to the concrete base and the post itself.
- Cleaning: Regularly clean the DuraPost structures to remove debris, dirt, and accumulated moisture. This prevents the growth of mold or mildew, which can accelerate deterioration.
- Moisture Management: Ensure proper drainage around the DuraPost base to prevent moisture buildup. This can be achieved through proper grading and drainage systems.
- Addressing Signs of Deterioration: Promptly address any signs of deterioration, such as cracking, warping, or rust. Early intervention minimizes the risk of further damage.
Identifying and Addressing Signs of Deterioration
Regular inspections are essential for identifying and addressing signs of deterioration before they lead to significant structural issues. Look for any changes in the appearance or stability of the DuraPost. Immediate action is needed to minimize damage and maintain the integrity of the structure.
- Cracking: Any visible cracking around the post or in the concrete base requires immediate assessment and repair. Addressing the crack prevents further widening and structural weakening.
- Warping: Noticeable warping of the posts indicates potential issues with the foundation or supporting structure. Evaluate the cause and implement corrective measures.
- Rust: Rust on the DuraPost material indicates corrosion. Take steps to address the rust and prevent further deterioration. Rust can weaken the material over time.
Maintenance Options Comparison
The following table compares different maintenance options for DuraPost, highlighting their descriptions, advantages, and disadvantages.
| Maintenance Option | Description | Pros | Cons |
|---|---|---|---|
| Regular Visual Inspections | Periodic visual checks for damage, settling, or movement. | Cost-effective, easy to perform. | May not detect all issues early. |
| Cleaning and Debris Removal | Removing dirt, debris, and accumulated moisture. | Simple, prevents deterioration. | Requires minimal effort, and only addresses surface issues. |
| Moisture Management | Ensuring proper drainage around the base. | Prevents water damage. | May require additional infrastructure. |
| Professional Repair | Addressing identified issues by a qualified contractor. | Ensures thorough repair, resolves complex problems. | Costlier, requires scheduling. |
Specific Installation Examples

Source: co.uk
DuraPost installation versatility extends beyond the basic fence post. This section details installation procedures for fences, decks, and retaining walls, along with diverse scenarios and their specific requirements. Proper installation is crucial for long-term structural integrity and aesthetic appeal.
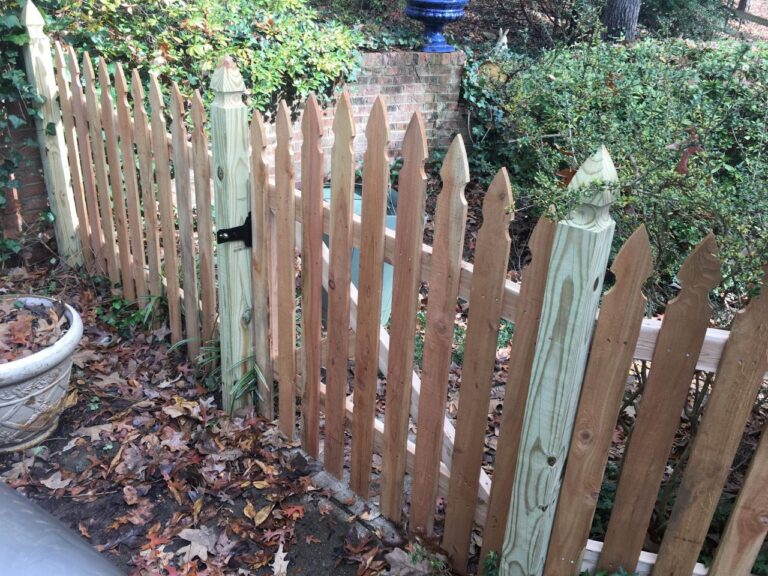
DuraPost Fence Installation
To ensure a sturdy and visually appealing fence, careful planning and execution are paramount. This involves determining the correct post spacing, considering the soil conditions, and selecting the appropriate DuraPost size for the fence height and anticipated load. A properly installed fence not only enhances property value but also contributes to safety and security.
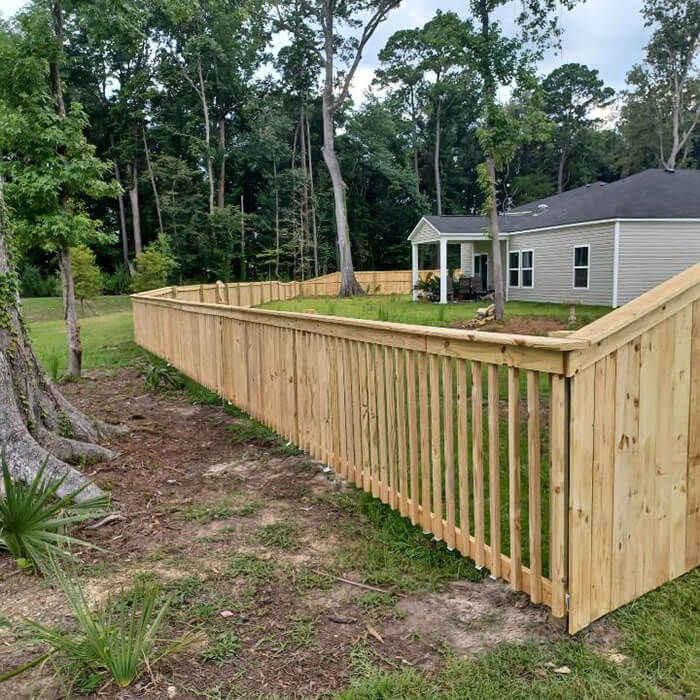
- Post Spacing: Calculate the appropriate spacing between posts based on fence height and anticipated load. Refer to the DuraPost installation guide for specific recommendations. Typical spacing for residential fences ranges from 6 to 8 feet. Adjust spacing based on the materials and construction style of the fence.
- Soil Conditions: Assess the soil conditions at the installation site. Firm, well-drained soil is ideal. If the soil is unstable or loose, consider using concrete footings to provide additional support.
- Post Selection: Choose DuraPost posts appropriate for the fence height and the expected load. Larger or taller fences may require heavier-duty posts. Review the DuraPost product specifications to determine the right size for your application.
- Excavation: Dig holes for each post, ensuring they are the appropriate depth for the specific post. This is often determined by the manufacturer’s specifications. The depth typically extends at least a foot below the frost line, and at least a foot beyond the frost line.
- Footings (Optional but Recommended): For increased stability, especially in unstable soil conditions, consider creating concrete footings. The footing depth should extend several inches below the frost line and the post should be embedded in the concrete. This provides a strong base for the post, which in turn ensures the fence’s stability and longevity.
DuraPost Deck Installation
DuraPost posts provide a durable and attractive support system for decks. The installation process requires meticulous attention to detail to ensure structural integrity and longevity. Key considerations include post spacing, decking material, and site-specific conditions.
- Post Spacing: The spacing between posts depends on the deck’s dimensions, the weight of the deck materials, and the type of decking. A general rule of thumb is to maintain spacing between posts that are within the range of 6-10 feet. Consult the manufacturer’s specifications for the exact spacing.
- Decking Material: The weight and type of decking materials will affect the load requirements on the posts. Heavier materials require sturdier posts and possibly larger concrete footings.
- Site Assessment: Evaluate the soil conditions at the installation site. Proper soil drainage and firmness are crucial for the long-term stability of the deck. Soft or unstable soil may require additional support or stabilization.
- Foundation Considerations: Similar to fences, proper foundation is crucial. For deck posts, use a combination of post depth and optional concrete footings to provide stability and support the weight of the structure. The depth of the footings should be determined by the local building codes and the type of soil.
DuraPost Retaining Wall Installation, Durapost installation guide
DuraPost’s strength and durability make it a suitable choice for retaining walls. Careful planning and accurate measurements are essential for achieving a stable and aesthetically pleasing structure. Important considerations include the height of the wall, the type of soil, and the anticipated load.
- Wall Height and Design: The height of the retaining wall directly impacts the structural requirements. Higher walls need more substantial support, potentially requiring multiple layers of DuraPost or additional reinforcement. The design of the wall should also consider the slope and terrain.
- Soil Type and Drainage: Understanding the soil conditions is critical. Different soil types have varying drainage capacities, which can affect the stability of the retaining wall. Proper drainage is essential to prevent water accumulation behind the wall.
- Load Assessment: Accurate load calculations are essential. Consider the weight of the retained soil, potential water pressure, and any additional loads that might be applied to the wall.
- Drainage Solutions: Proper drainage is essential to prevent water buildup behind the wall. Consider installing drainage pipes or other systems to ensure water runs away from the structure.
Last Point
This DuraPost installation guide serves as a valuable resource for anyone undertaking a DuraPost project. From initial site preparation to final inspections, the detailed steps and considerations ensure a professional and lasting result. Troubleshooting tips and preventative maintenance suggestions will further extend the life of your DuraPost structure. Whether you’re a seasoned contractor or a DIY enthusiast, this guide provides the necessary knowledge and insights to successfully complete your project.