Installing a Split Rail Fence A Comprehensive Guide
Installing a split rail fence is a rewarding project, transforming your property with rustic charm and functionality. This guide provides a detailed overview, from planning and material selection to installation and maintenance. We’ll explore various styles, materials, and installation methods to ensure your fence is both beautiful and durable.
From choosing the perfect wood to calculating material needs, this guide simplifies the process. We’ll walk you through the steps, providing helpful tips and avoiding common pitfalls to achieve a professional-looking fence with minimal effort. We’ll even cover different styles, materials, and maintenance strategies, so you can personalize your project.
Planning and Design: Installing A Split Rail Fence
A well-planned split rail fence project ensures a sturdy and aesthetically pleasing result. Careful consideration of style, materials, and measurements is crucial for a successful installation. This section will detail the steps for planning and designing your split rail fence.
Planning is a crucial initial step in a split rail fence project, which determines the overall aesthetic and functionality of the fence. The proper selection of materials, style, and dimensions will directly impact the project’s cost and longevity.
Split Rail Fence Styles
Various split rail fence styles offer different aesthetic appeals and structural characteristics. Classic split rail fences feature vertical rails that are typically spaced between 2 to 4 feet apart, supported by horizontal posts. Variations exist, including styles with wider or narrower rails, different post spacing, or the addition of decorative elements.
Materials for Split Rail Fences
Choosing the right materials is critical for the longevity and visual appeal of the fence. Common materials include wood, metal, and composite options.
- Wood: Popular choices include pressure-treated lumber, cedar, or redwood. Pressure-treated wood resists rot and decay, extending the fence’s lifespan. Cedar and redwood offer a natural aesthetic but require more maintenance. Wood is generally more affordable than metal, but maintenance is a consideration.
- Metal: Metal options, such as galvanized steel or aluminum, offer high durability and longevity. They require minimal maintenance, making them a low-maintenance choice. Metal can be more expensive than wood upfront, but the long-term cost savings can be significant.
- Composite: Composite materials combine wood fibers with polymers, providing a balance between natural aesthetics and durability. They resist rot, insects, and decay, mimicking the look of wood but with reduced maintenance. Composite options are often the most expensive upfront, but can prove to be a more economical long-term solution due to minimal maintenance.
Ideal Fence Height and Width, Installing a split rail fence
The height and width of your split rail fence should be carefully considered based on your property’s characteristics and intended use. A taller fence may offer more privacy, while a shorter fence may be more suitable for a less private area. The width of the rails, the spacing between them, and the overall fence structure will contribute to the fence’s aesthetic.
Measuring and Layout
Accurate measurements are essential for a proper fence layout. Use a tape measure to determine the exact dimensions of the fence area. Establish stakes at each corner and along the fence line, using string lines to mark the boundaries.
Fence Post Options
Post selection is crucial for a strong and stable fence. Pressure-treated wood posts are a popular choice due to their affordability and relatively easy installation. Metal posts, such as galvanized steel, offer superior durability and longevity.
- Pressure-treated wood: Provides a good balance between cost and durability. However, they require regular maintenance to prevent rot and decay. The cost is often lower than metal.
- Metal posts: Offer exceptional durability and longevity, with minimal maintenance requirements. They are more expensive than pressure-treated wood posts.
Material Cost Comparison
The following table provides a general cost comparison for different materials and installation methods. Note that these figures are estimates and may vary based on location, material availability, and labor costs.
| Material | Cost per linear foot (approx.) | Installation Cost per linear foot (approx.) |
|---|---|---|
| Pressure-treated Wood | $5-$15 | $10-$25 |
| Galvanized Steel | $15-$30 | $15-$35 |
| Composite | $20-$40 | $15-$30 |
50-Foot Section Layout
For a 50-foot section, plan for a classic split rail design. Use 4-foot tall posts, spaced every 8 feet. Calculate the number of rails needed based on the desired rail spacing.
Material Calculation
To calculate total materials, multiply the total fence length by the cost per linear foot for each material. For example, a 50-foot fence using pressure-treated wood at $10/linear foot would cost $500 for the wood itself.
Materials and Tools
Selecting appropriate materials and tools is crucial for a successful split rail fence installation. Careful consideration of wood types, durability, and proper preparation methods ensures a long-lasting and aesthetically pleasing fence. A well-equipped toolkit and understanding of fastening techniques contribute significantly to the efficiency and quality of the project.
Wood Selection for Split Rail Fences
Various wood types are suitable for split rail fences, each with its own characteristics regarding durability and maintenance. Hardwoods like oak, cedar, and locust are preferred for their natural resistance to rot, decay, and insect infestations. These woods tend to last longer and require less maintenance compared to softer woods. Softwoods like pine, while less expensive, are susceptible to decay and require more frequent treatment and upkeep. Consider the local climate and moisture levels when choosing wood, as these factors significantly influence the longevity of the fence.
Essential Tools for Installation
A comprehensive toolkit is essential for a smooth and efficient installation. Essential tools include hand saws (for cutting rails and posts), a measuring tape, a level, a hammer, post hole diggers (or a post hole auger), and a post driver or mallet. Additional tools like a drill and screws (for added reinforcement), or specialized tools for shaping the rails may be needed depending on the complexity of the design. Safety equipment, such as work gloves and safety glasses, should always be worn.
Wood Preparation
Proper preparation of the chosen wood significantly impacts the fence’s lifespan. First, the wood should be inspected for defects, such as rot or insect damage. Damaged pieces should be discarded. Next, the wood should be cut to the specified dimensions, following the design plan. For added durability, consider treating the wood with a preservative, such as a wood sealant or a pressure-treated solution. This helps prevent rot, insect infestation, and moisture damage, thus extending the life of the fence.
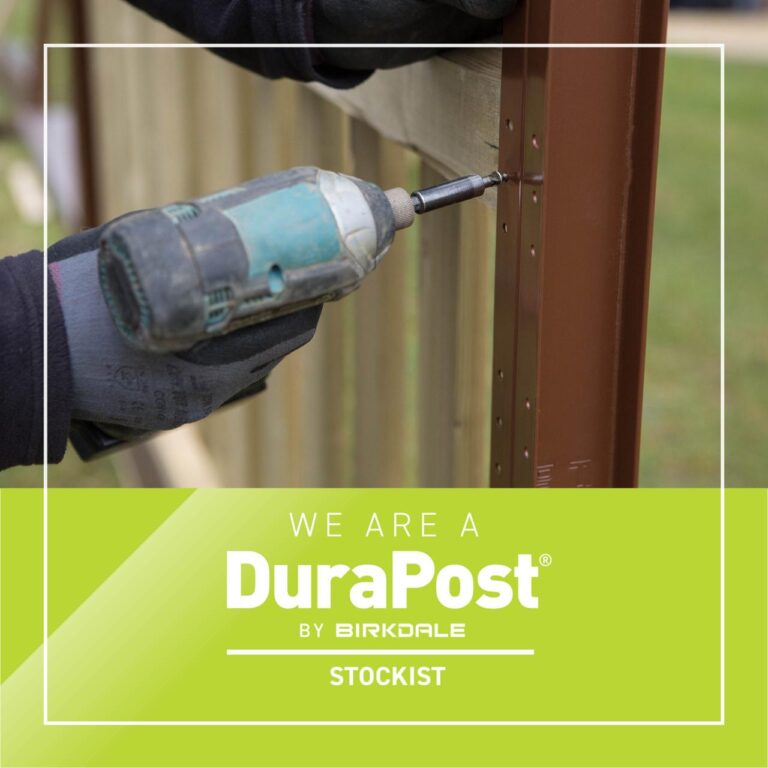
Fasteners for Joining Rails and Posts
Various types of fasteners are used to join rails to posts and rails to rails. Nails are a common and relatively inexpensive option, suitable for simpler designs. However, screws offer greater holding power and flexibility in adjustments. Metal brackets provide additional reinforcement for joints, especially at stress points. Choose fasteners appropriate for the wood type and the anticipated load on the fence.
Hardware for Split Rail Fences
Appropriate hardware includes fence staples, screws, and metal brackets for connecting rails to posts and rails to rails. Look for galvanized or stainless steel options for enhanced rust resistance. Use the appropriate hardware based on the wood type, size of the rails, and the overall design of the fence. The choice of hardware directly influences the strength and longevity of the fence.
Materials and Tools List
Protecting Wood from Rot and Decay
Protecting wood from rot and decay is a critical aspect of split rail fence construction. Pressure-treating lumber is a common method, which involves injecting preservatives into the wood to make it more resistant to moisture damage. Applying wood sealants or preservatives can further enhance protection. Regular maintenance, such as inspecting the fence for signs of rot or damage, and repairing any issues promptly, can significantly extend the fence’s lifespan.
Installation Procedures
Source: bestgateandfence.com
Installing a split-rail fence requires careful attention to detail and a methodical approach. Proper installation ensures a sturdy, visually appealing fence that will last for years. Following a step-by-step process and paying close attention to leveling and plumb lines are crucial for a successful outcome.
Fence Post Installation
Careful post installation is the foundation of a robust fence. Incorrectly placed posts will compromise the entire structure. Ensure the posts are set deep enough into the ground for stability, considering the expected soil conditions and potential for frost heave.
- Excavation: Dig post holes to the specified depth, ensuring the bottom of the hole is level. This ensures even bearing for the post.
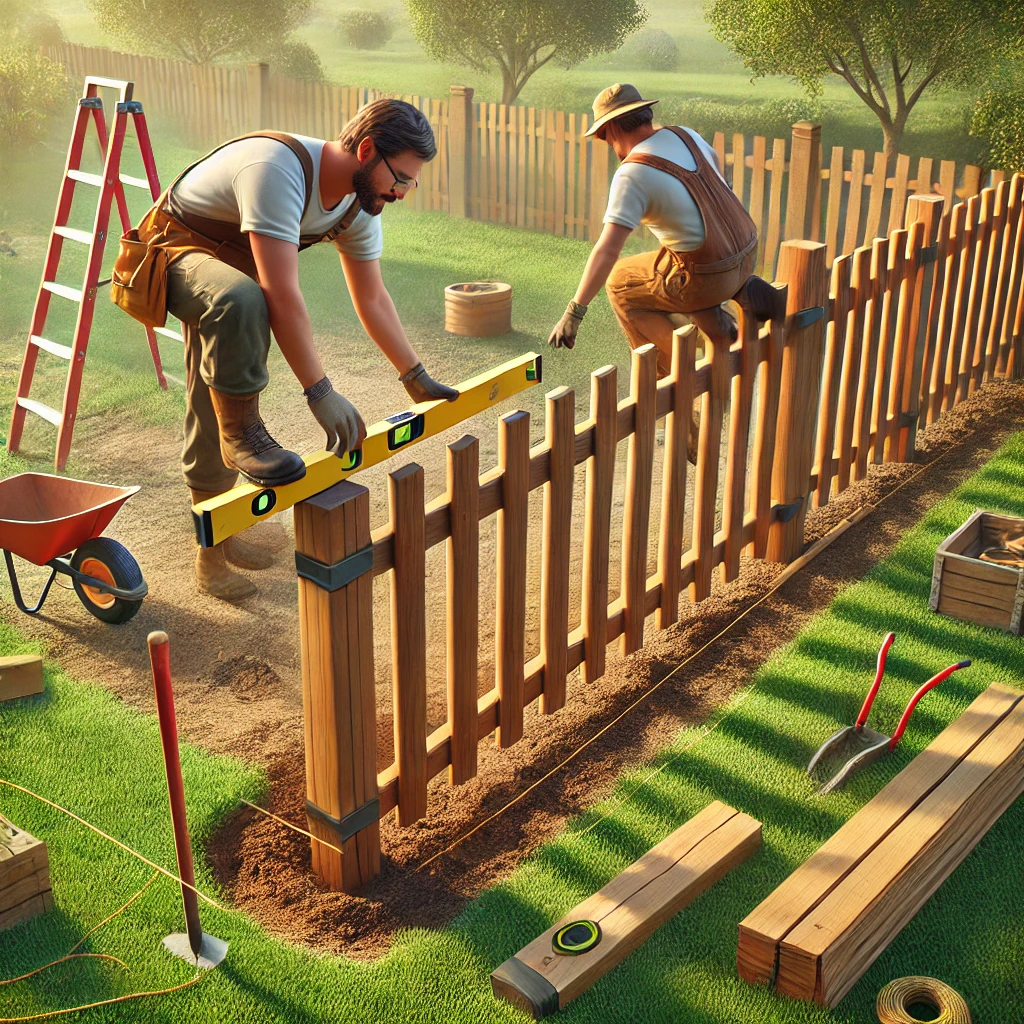
- Post Placement: Carefully position the post in the hole, ensuring it’s plumb and level. Use a spirit level and a plumb bob to check for accuracy.
- Post Setting: Fill the hole with a mixture of gravel and soil, compacting the material thoroughly around the post. This helps distribute weight evenly and prevents shifting.
- Post Support: If necessary, use concrete or other appropriate post setting materials to reinforce the post’s stability, especially in loose soil. Ensure the concrete cures completely before proceeding.
- Post Top Leveling: Once the posts are set, use a level to ensure the tops of the posts are consistently level to guarantee even rail placement later on.
Rail Attachment
Securely attaching rails to posts is paramount for a long-lasting fence. Different methods offer varying degrees of strength and visual appeal.
- Rail Alignment: Precise alignment is crucial for an aesthetically pleasing and functional fence. Use a straightedge to ensure rails are parallel and at the desired height.
- Fastener Selection: Choose fasteners appropriate for the wood used for the rails and posts. Consider the environment (moisture, temperature). Use galvanized nails, screws, or specialized fence clips, choosing the most suitable for the application.
- Clamping Technique: For precise alignment, using clamps can aid in achieving the correct spacing between rails and posts. Clamps hold the rail firmly in place while fasteners are driven in.
- Spacing Considerations: Maintain consistent spacing between rails for a professional look. Using a measuring tape ensures uniformity. Adjust spacing to match the intended look of the fence.
- Rail Attachment Method: Use appropriate techniques for attaching rails, ensuring that they are securely fastened to the posts without causing damage to the wood.
Split Rail Installation
Split rails, with their unique aesthetic, require specific installation procedures.
- Rail Preparation: Prepare the split rail by ensuring its alignment with the other rails, ensuring consistency and a professional look.
- Placement: Position the split rail between the posts, aligning it with the existing rail system.
- Fastening: Secure the split rail to the posts using appropriate fasteners. Use galvanized nails or screws to achieve secure fastening, considering the material and expected stress on the rail.
- Spacing: Consistent spacing between the split rails is key to maintaining a visually appealing and even fence line.
- Securing Split Rails: Secure the split rails to the posts with nails, screws, or other appropriate fasteners, ensuring even tension and a solid hold. Consider using special split rail clamps for extra stability.
Corner and Gate Post Installation
Corner and gate posts require reinforced support for the fence’s integrity.
- Corner Post Reinforcement: Corner posts are subject to greater stress and require extra support. Reinforcing the corner post with additional concrete or angle braces will improve its stability and prevent sagging or twisting.
- Gate Post Installation: Ensure gate posts are firmly anchored to handle the weight of the gate and the stresses associated with opening and closing. Consider using heavier-duty posts and additional reinforcement for gate posts.
- Corner Post Alignment: Precise alignment of corner posts is crucial to ensure the fence’s overall structural integrity and visual appeal. Use a level and plumb bob to ensure proper placement.
- Gate Post Support: For added strength and longevity, consider using extra support systems or bracing for the gate post. This will help to distribute the weight of the gate more evenly.
Common Mistakes and Prevention
Avoiding common mistakes is crucial for a successful fence installation.
- Insufficient Post Depth: Insufficient post depth can lead to the fence leaning or collapsing. Dig the holes to the recommended depth for the soil conditions.
- Inadequate Fastening: Using insufficient fasteners can lead to loose rails and a compromised fence. Use the correct type and number of fasteners for the materials used.
- Uneven Rail Spacing: Uneven rail spacing can create an unprofessional appearance. Use a measuring tape to maintain consistent spacing.
Finishing Touches and Maintenance
A well-maintained split rail fence not only enhances the aesthetic appeal of your property but also extends its lifespan significantly. Proper finishing and ongoing maintenance are crucial for preserving the fence’s structural integrity and appearance. This section Artikels the essential steps to achieve this.
Finishing Options
Choosing the right finish for your split rail fence protects it from the elements and enhances its visual appeal. Options include staining, painting, or sealing. Staining penetrates the wood, offering a natural look and providing protection against moisture. Painting offers a wider range of colors and can be applied more easily to cover imperfections. Sealing creates a protective barrier against moisture and UV rays, prolonging the life of the wood. The choice depends on personal preference and the desired aesthetic.
Protecting from the Elements and Pests
Protecting your split rail fence from weather and pests is vital for its longevity. Regular inspections are crucial to identify and address potential issues early. Weathering, such as prolonged exposure to rain, sun, and snow, can cause significant damage. Addressing moisture intrusion and UV damage through sealing or staining is a critical step in preserving the fence’s structural integrity. Pests, like termites and wood-boring insects, can also compromise the fence’s structural integrity. Regular inspections and the application of appropriate pest control measures can prevent infestation and minimize damage.
Maintenance Procedures
Regular maintenance ensures the longevity and aesthetic appeal of your split rail fence. Consistent inspection and timely repairs are vital. A preventive approach to maintenance is more effective than reactive repairs.
Maintenance Schedule
Regular inspection, timely repairs, and appropriate treatment are key to maintaining a healthy and attractive split rail fence.
| Task | Frequency | Description |
|---|---|---|
| Inspection | Weekly | Visually inspect the entire fence for signs of damage, such as cracks, splinters, or loose rails. Check for any signs of pest activity. |
| Repair | As needed | Repair any broken rails or posts promptly. Use appropriate fasteners and ensure secure connections. |
| Cleaning | Quarterly | Clean the fence using a mild detergent solution and a soft-bristled brush to remove dirt and debris. Rinse thoroughly. |
| Staining/Painting | Annually or as needed | Re-stain or repaint the fence if necessary to maintain its aesthetic appeal and protect it from the elements. |
| Pest Control | Biannually or as needed | Inspect for pest activity and apply appropriate pest control measures if needed. Professional treatment might be necessary for extensive infestations. |
Addressing Specific Issues
Identifying and resolving issues like rotting posts or loose rails promptly is essential. Rotting posts are a common problem and often indicate moisture intrusion. Replace the rotting post with a new one, ensuring proper drainage around the base. Loose rails can compromise the structural integrity of the fence. Tighten any loose fasteners or replace the rail entirely if necessary. Consult a professional if the issue persists or if you lack the necessary expertise.
Variations and Alternatives
A split rail fence offers a distinct aesthetic, but its suitability depends on the specific needs and context. Exploring variations and alternatives helps homeowners tailor the fence to their property and preferences. This section delves into different styles, comparisons with other fence types, and situations where a split rail fence might not be the ideal choice.
A variety of modifications and alternative materials can enhance the fence’s practicality and visual appeal. Understanding these options empowers homeowners to make informed decisions regarding their fence project.
Different Styles and Designs
Split rail fences can be adapted to various designs. A classic split rail design uses horizontal rails supported by vertical posts. More elaborate designs might include decorative elements like curved rails or additional rails to create a more intricate pattern. Some variations may incorporate angled or staggered rails to add depth and visual interest. Consider the style of the house, surrounding landscape, and desired aesthetic when choosing a design.
Comparison with Other Fence Types
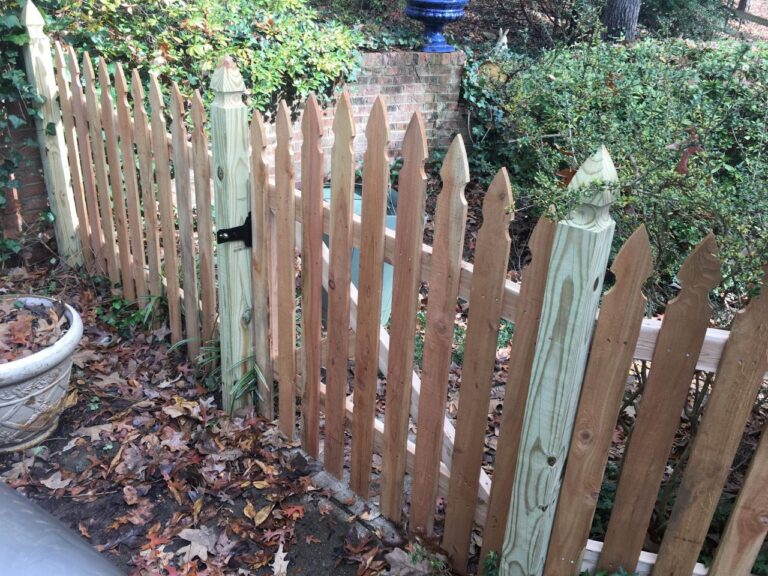
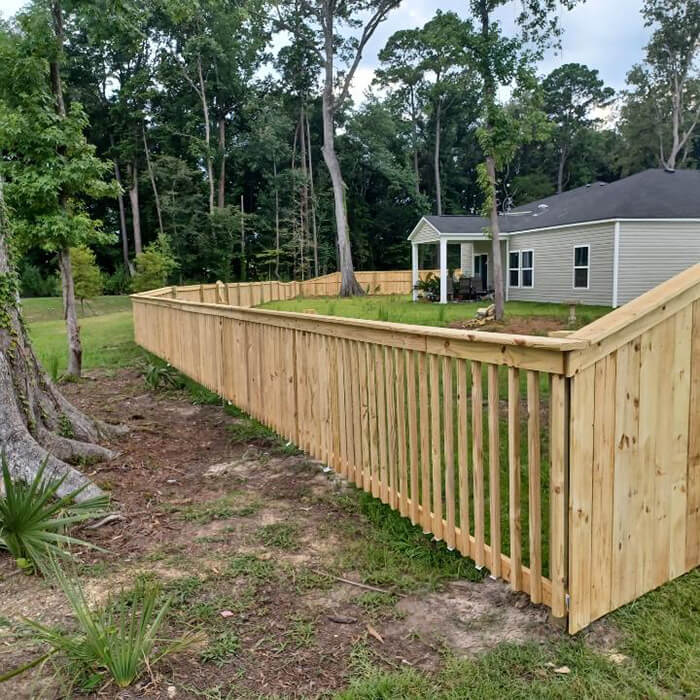
Split rail fences contrast with other fence types in terms of aesthetics and function. Picket fences are characterized by their tall, evenly spaced vertical slats, creating a more decorative and often lighter appearance. Privacy fences, on the other hand, are constructed to block views, typically using materials like wooden boards or composite panels. Chain-link fences are robust and economical, providing security and visibility. Split rail fences are often chosen for their rustic charm and open design, suitable for properties where a more permeable barrier is desired.
Situations Where a Split Rail Fence Might Not Be the Best Choice
Split rail fences are not ideal for every property or use case. Areas prone to heavy foot traffic or significant wind loads might necessitate a more robust and durable fence material. A split rail fence might not offer the level of privacy needed in certain situations. If a complete barrier against sightlines is a top priority, a different fence type is more appropriate. The desired level of security should also be considered; split rail fences might not provide the same level of security as other, more substantial options.
Alternative Materials and Construction Methods
While traditional split rail fences use wood, alternative materials can be employed. Metal rails and posts offer increased durability and longevity. Composite materials provide a low-maintenance alternative, resisting rot and insect damage. Consider the long-term maintenance requirements and aesthetic preferences when selecting materials.
Modifications to Standard Designs
Standard split rail designs can be adapted to meet specific needs. Adding gates allows for controlled access. Incorporating decorative elements, such as custom-shaped rails or decorative hardware, can further personalize the fence’s appearance. Integrating a seating area or a climbing structure can transform the fence into a functional and engaging feature of the property.
Visual Comparison of Different Designs
A visual comparison highlights the diverse possibilities. Imagine a classic split rail fence with straight rails and evenly spaced posts. Contrast this with a more elaborate design featuring curved rails and decorative accents. Alternatively, consider a split rail fence with added gates, strategically positioned for easy access. These variations in design and materials offer a spectrum of options to suit diverse tastes and property characteristics.
Closing Notes
In conclusion, installing a split rail fence is a significant undertaking that blends aesthetics with practicality. By following this comprehensive guide, you can confidently navigate the entire process, from design to maintenance. Whether you’re aiming for a rustic look or a more modern interpretation, this guide equips you with the knowledge to create a stunning and enduring split rail fence. Remember to prioritize safety and accuracy throughout the installation.