Picket Fence Installation Near Me
Picket fence installation near me is a crucial aspect of property enhancement, transforming yards and creating distinct aesthetics. This comprehensive guide explores the entire process, from initial planning to final touches, and considers various factors to ensure a successful installation.
We’ll delve into the different types of picket fences, their materials, and the pros and cons of each. Furthermore, we’ll cover essential pre-installation steps, including site assessment, measurements, and soil preparation. The guide will also detail the installation process for fence posts, pickets, and finishing touches, along with crucial maintenance tips for long-term durability. Finally, we’ll discuss finding local contractors and essential considerations when choosing one.
Introduction to Picket Fence Installation
A picket fence is a common and visually appealing landscaping feature, providing a boundary and enhancing the aesthetic appeal of a property. Proper installation is crucial for durability and longevity, ensuring the fence remains a functional and attractive addition to the property. This involves careful planning, precise measurements, and adherence to established construction techniques.
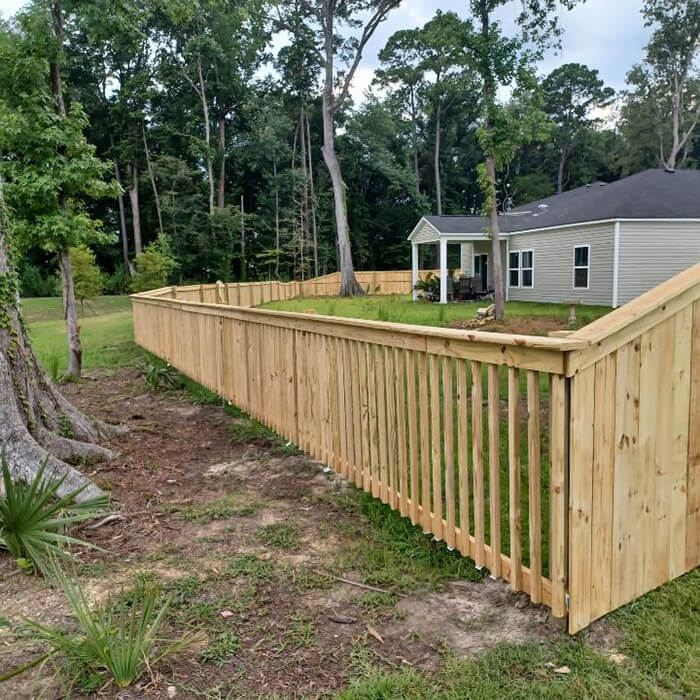
Picket fence installation encompasses a series of steps, from site preparation to the final finishing touches. A well-executed installation will stand the test of time, requiring minimal maintenance and ensuring the fence remains a valuable asset to the property. Different types of picket fences cater to various design preferences and property characteristics.
Types of Picket Fences
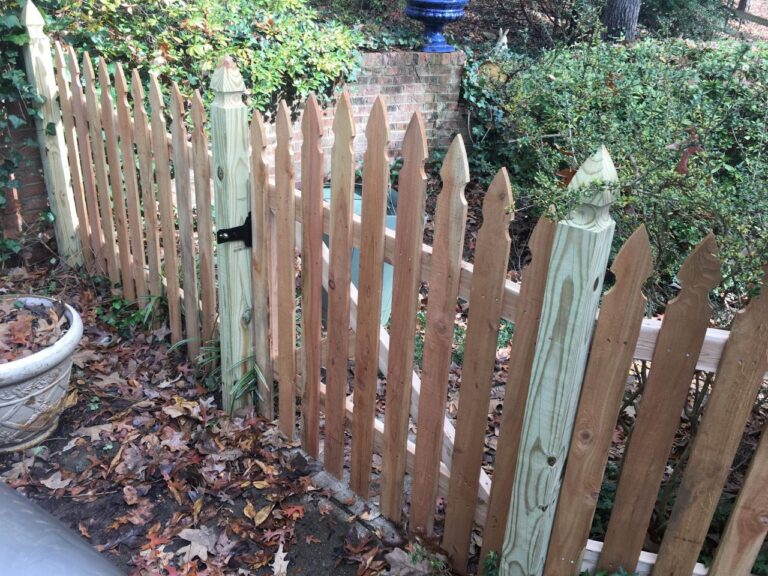
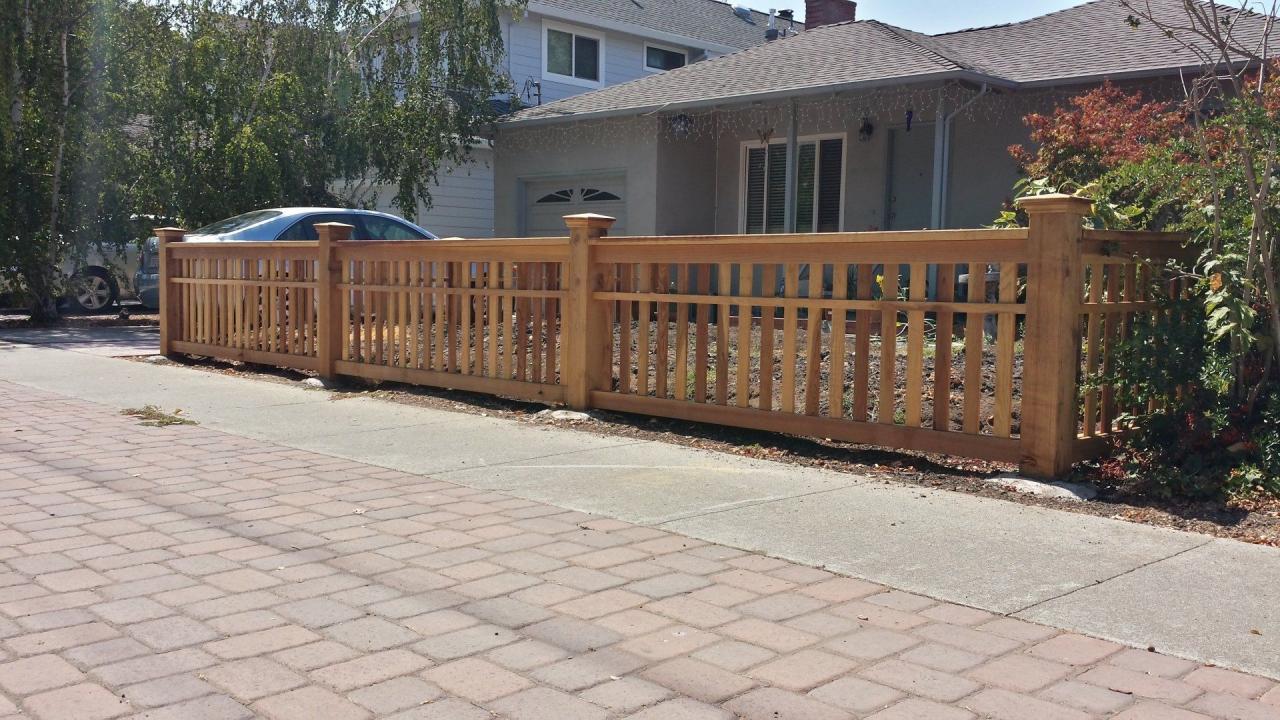
Various styles of picket fences exist, each with unique characteristics. Some popular choices include traditional, modern, and decorative styles. Traditional picket fences often feature simple, uniform pickets, while modern styles may incorporate more intricate designs or unconventional materials. Decorative fences can incorporate elements like arches, curves, or decorative accents. The choice of style depends heavily on the overall aesthetic of the property.
Installation Steps
The process of installing a picket fence typically involves these key steps:
- Site Preparation: This stage involves clearing the designated area, marking the fence lines, and ensuring the ground is level. This initial step is crucial for a sturdy and even fence.
- Post Installation: Posts are crucial for supporting the fence. They need to be firmly set into the ground, ensuring a stable foundation. Proper spacing is vital for even support. Using concrete footings or pressure-treated wood for the posts enhances their durability and stability.
- Railing Installation: The rails, which are horizontal components, are secured to the posts. These rails form the structure that holds the pickets.
- Picket Installation: The pickets are then attached to the rails, ensuring they are evenly spaced and aligned. This step demands precision and attention to detail.
- Finishing Touches: Once all the pickets are in place, the final touches involve painting, staining, or sealing the fence to protect it from the elements. Proper finishing enhances the aesthetic appeal and prolongs the fence’s lifespan.
Materials Used in Picket Fence Construction
A variety of materials are used in constructing picket fences. The choice of material directly impacts the fence’s longevity, aesthetic appeal, and maintenance requirements. Common materials include wood, vinyl, and metal.
Material Comparison
| Material | Pros | Cons | Cost |
|---|---|---|---|
| Wood | Aesthetically pleasing, customizable, relatively affordable | Requires regular maintenance (painting, staining), susceptible to rot and insect damage, can warp or crack over time | Moderate |
| Vinyl | Low maintenance, resists rot, insect damage, and warping, long lifespan, durable | Can be more expensive than wood initially, may not match the natural aesthetic of some properties | High |
| Metal | Durable, resistant to rot, insects, and weather, long lifespan, low maintenance | Can be more expensive than wood, may not have the same aesthetic appeal as wood or vinyl | High |
Preparing for Picket Fence Installation: Picket Fence Installation Near Me
Source: cdn-website.com
Getting your picket fence installed correctly starts with meticulous preparation. A well-planned approach ensures a sturdy, attractive fence that lasts for years. Careful site assessment, precise measurements, and appropriate soil preparation are crucial for a successful project. Ignoring these steps can lead to costly repairs or a fence that doesn’t meet expectations.
Thorough preparation minimizes potential issues during installation and maximizes the longevity of your new picket fence. This includes a detailed evaluation of the site, precise measurements, and appropriate soil preparation. Understanding these steps ensures a smooth installation process and a strong, aesthetically pleasing fence.
Site Assessment and Measurements
Accurate measurements are paramount for a successful picket fence installation. Incorrect measurements lead to wasted materials, costly adjustments, and a fence that may not fit the intended space. A meticulous site assessment, including noting any existing obstructions or uneven terrain, is crucial. This proactive step helps in planning the optimal fence layout and addressing potential challenges before construction. Consider factors such as property lines, existing landscaping, and any utilities that might run beneath the proposed installation area.
Importance of Accurate Measurements
Precise measurements directly impact the fence’s structural integrity and aesthetic appeal. Inaccurate measurements can result in a fence that’s too short, too long, or misaligned, compromising both function and appearance. Using a tape measure and level, verify dimensions for post placement, gate locations, and the overall fence length. Detailed plans and scaled drawings, along with a visual representation of the proposed fence, are beneficial to ensure accuracy.
Tools and Equipment
The right tools are essential for efficient and safe picket fence installation. A comprehensive toolkit should include a tape measure, level, post hole digger, shovel, post driver, and various hand tools for fastening the fence components. Consider renting specialized equipment, such as a post hole auger, if necessary for challenging soil conditions or larger projects. A sturdy work bench or table is also beneficial for organizing tools and materials.
Soil Preparation and Foundation
A stable foundation is critical for a long-lasting picket fence. Proper soil preparation ensures that the fence posts are firmly anchored and resist shifting or tilting. Compacting the soil around the posts and ensuring proper depth will significantly improve the stability of the fence. Use a post hole digger or auger to create the necessary holes. Use gravel or other suitable material to add drainage and compaction to the soil in the post holes.
Leveling the Ground
Leveling the ground for the fence posts is essential for a straight and stable fence line. Uneven ground can cause posts to lean or shift over time, compromising the fence’s structural integrity. Using a level, carefully adjust the soil around the post holes to ensure each post is perfectly vertical. This ensures that the entire fence line remains aligned and visually appealing.
Step-by-Step Guide for Preparing the Installation Area
A methodical approach to preparing the installation area is key to a successful picket fence project. Follow these steps:
- Thoroughly assess the installation area, noting any obstructions or uneven terrain. This includes confirming property lines and checking for utilities.
- Precisely measure the length and width of the fence, taking into account the intended placement of posts, gates, and any other structural elements. Document these measurements.
- Prepare the soil by digging post holes to the appropriate depth and width. Use a post hole digger or auger, and ensure the soil is compacted around the holes.
- Level the ground around each post hole using a level to ensure each post is perfectly vertical.
- Place and secure temporary markers at each post location to maintain accuracy throughout the installation process.
Installing the Fence Posts
Proper installation of fence posts is crucial for a strong and lasting fence. A sturdy foundation ensures the fence’s longevity and stability, preventing sagging or leaning over time. Careful attention to detail during this phase directly impacts the overall quality and lifespan of the entire project.
Methods for Installing Fence Posts
Various methods exist for installing fence posts, each with its own set of advantages and disadvantages. The optimal choice depends on factors like soil type, budget, and desired aesthetic.
- Direct Burial: This method involves directly burying the post in the ground, often using concrete or other stabilizing agents. It’s a straightforward and cost-effective approach, particularly suitable for simple installations and lightweight fences. However, it can be less durable in challenging soil conditions.
- Post Hole Digger: Post hole diggers, whether manual or powered, are designed to efficiently create precise holes for fence posts. This method provides greater control over hole depth and width. Manual diggers are suitable for smaller projects, while powered options are faster for larger jobs. This method can be more time-consuming than other options for larger projects.
- Pier and Post Installation: This method involves constructing a concrete pier below ground level to support the post. This provides exceptional stability and is especially useful for areas with challenging soil conditions or heavy-duty fences. It is a more complex and time-consuming installation process, with higher costs involved.
Digging Post Holes
Precise digging of post holes is essential for a stable fence. Incorrect hole depth or width can lead to uneven settling and compromised structural integrity.
The ideal hole depth should be at least twice the length of the post buried underground, plus an extra 6-12 inches for a concrete base. The width of the hole should be slightly wider than the post base to accommodate the backfill material and ensure proper support.
Using a measuring tape and level is essential to ensure accuracy. For larger projects, a post hole digger can speed up the process while maintaining accuracy.
Setting Fence Posts Straight and Plumb
Ensuring posts are correctly aligned is vital for a visually appealing and structurally sound fence. Using a level and a string line ensures vertical alignment, preventing leaning and future issues.
- Leveling: A spirit level is essential to verify that the post is vertical. Use a plumb bob or a laser level to ensure the post is perfectly plumb from top to bottom.
- String Line: A string line helps to establish a straight line between multiple posts, ensuring the fence runs in a straight line.
- Staking and Measurement: Marking out the post locations in advance and measuring the distances between them is crucial for accurate positioning.
Securing the Posts to the Ground
Various methods can be used to secure the posts to the ground, each with its own set of advantages and disadvantages.
- Concrete: Pouring concrete into the post holes is a common and reliable method. Concrete provides a strong and durable foundation, essential for heavy-duty fences. It is important to use the correct mix and ensure proper curing for maximum strength.
Concrete mix should be appropriate for the soil conditions and weight of the fence.
- Gravel and Stone: Using gravel or stones can be an alternative to concrete, especially in areas with limited access to concrete or for less-demanding applications. It’s less expensive than concrete but may require additional stabilization methods.
- Metal Post Anchors: Metal post anchors offer a quicker installation process than concrete, providing a reliable way to secure the posts to the ground. They are particularly helpful in areas with challenging soil conditions or when dealing with a higher volume of posts.
Types of Post Bases
Post bases offer various options for stabilizing and enhancing the aesthetic appeal of fence posts.
- Concrete Bases: A simple and durable option that provides a solid base for the fence posts. These are suitable for various types of fences, ensuring a strong and stable foundation. They offer a clean and professional look.
- Metal Post Bases: Metal post bases are more resistant to corrosion and can offer greater flexibility in design. They are commonly used in industrial or commercial settings and offer a more modern look.
- Wood Post Bases: Wood post bases can be custom-designed to complement the aesthetic of the fence, offering a more natural appearance. They may require more maintenance and are less durable than concrete or metal alternatives.
Attaching the Pickets
Securing the pickets to the fence posts is a critical step in achieving a sturdy and aesthetically pleasing fence. Proper attachment methods, spacing, and fastener selection are paramount for long-term durability and a professional finish. This section details the various attachment techniques and considerations.
Different Attachment Methods
Different picket styles and materials require varying attachment methods. For instance, pressure-treated lumber might necessitate more robust fasteners than cedar or redwood. Common methods include using nails, screws, or specialized picket clips. Each method presents its own advantages and disadvantages, affecting the fence’s longevity and appearance.
Picket Spacing and Alignment
Consistent spacing and precise alignment of pickets are essential for a uniform and visually appealing fence. Uneven spacing can detract from the fence’s overall aesthetic. Measuring and marking the spacing beforehand ensures accuracy and efficiency. Using a measuring tape and a level is crucial for maintaining straight lines and proper alignment. This method prevents misalignment and gaps.
Choosing the Right Fasteners
The longevity and aesthetic appeal of the fence directly correlate with the choice of fasteners. Using the appropriate fasteners ensures a secure hold, resisting weather damage and preventing the pickets from loosening over time. Galvanized nails or stainless steel screws are often preferred due to their resistance to rust and corrosion. Consider the material of the pickets and posts when selecting the right fasteners. A material’s density and thickness affect the optimal fastener choice.
Step-by-Step Picket Attachment Guide
- Prepare the Pickets: Ensure pickets are cut to the correct length and are clean and dry. Any splinters or imperfections should be addressed before installation. This will make the attachment process much easier and safer.
- Mark the Posts: Use a pencil or marker to mark the desired spacing on the fence posts. This ensures even spacing between the pickets. Use a level to ensure the pickets are properly aligned.
- Attach the Pickets: Start at one end of the fence and carefully drive the fasteners into the marked locations. Begin with pilot holes (if using screws) to prevent splitting the pickets. Work systematically, ensuring each picket is securely fastened.
- Inspect and Adjust: After attaching several pickets, step back and visually inspect the alignment and spacing. Adjust as needed to maintain uniformity. Double-check the fasteners to ensure they are secure and not loose.
- Final Inspection: Once all pickets are attached, conduct a final visual inspection to ensure the fence meets the desired standards of alignment and spacing. A thorough final check ensures a professional finish.
Picket Styles and Installation
Different picket styles demand unique installation techniques. For example, decorative pickets with intricate designs might require more precise placement and specialized fasteners. Simple, straight pickets typically use standard methods. A common style is the classic “square picket” style. This is characterized by a square or rectangular cross-section. Installation is straightforward, typically using screws or nails, ensuring even spacing and alignment. Another example is the “half-round picket” style. The curved shape necessitates a slight adjustment in spacing and fastener placement.
Finishing Touches and Maintenance
Completing your picket fence installation involves more than just assembling the components. Proper finishing techniques ensure a polished aesthetic and protect the fence from the elements. This phase is crucial for the fence’s longevity and curb appeal. A well-maintained picket fence will enhance your property’s value and provide lasting enjoyment.
Finishing Techniques for a Polished Look
Proper finishing techniques are essential for a visually appealing and durable fence. Applying a high-quality stain or paint creates a protective layer that prevents wood rot, decay, and insect infestation. Careful preparation before application is key to achieving a flawless finish.
Staining or Painting the Fence, Picket fence installation near me
Thorough preparation is vital before staining or painting. First, clean the fence thoroughly, removing any dirt, debris, or loose wood. Repair any damaged areas and allow the wood to dry completely. Apply a primer to the fence to create a smooth base and enhance adhesion for the topcoat. Follow the manufacturer’s instructions for the specific stain or paint, including application techniques and drying times. Applying multiple thin coats rather than one thick coat is recommended for even coverage and a long-lasting finish. Using a high-quality brush or sprayer will improve application quality.
Sealing the Fence for Protection
Sealing the fence is a critical step in protecting it from moisture, insects, and other environmental factors. A sealant creates a barrier, preventing water from penetrating the wood and causing rot or decay. Proper sealing enhances the fence’s lifespan and helps maintain its attractive appearance. Different sealants cater to varying wood types and environmental conditions.
Maintaining a Picket Fence for Long-Term Durability
Regular maintenance ensures the longevity of your picket fence. Consistency is key, as addressing minor issues promptly prevents them from escalating into larger problems. By adhering to a routine maintenance schedule, you can maintain the fence’s aesthetic appeal and extend its lifespan significantly.
Preventing and Repairing Damage
Regular inspection for damage is essential. Promptly address any signs of damage, such as splinters, cracks, or loose pickets. Minor repairs, like replacing damaged pickets or tightening loose screws, can prevent larger problems. A comprehensive approach to damage prevention and repair minimizes the risk of significant future issues.
Picket Fence Maintenance Schedule
| Task | Frequency | Description |
|---|---|---|
| Inspection | Weekly | Visually inspect the fence for any signs of damage, such as cracks, splinters, or loose pickets. Check for signs of insect infestation or rot. |
| Cleaning | Monthly | Clean the fence using a soft brush or hose to remove dirt, debris, and loose particles. Pay special attention to areas prone to accumulating grime. |
| Repair | As needed | Address any identified damage promptly. Replace broken or damaged pickets, repair cracks, and tighten loose screws or fasteners. |
Local Resources and Contractors
Finding the right contractor is crucial for a successful picket fence installation. Thorough research and careful consideration of potential installers can save you time, money, and headaches down the road. Choosing a reputable company with a proven track record of quality work is key to achieving a lasting and aesthetically pleasing fence.
Local businesses specializing in picket fence installation are often a good starting point. They have experience working with the local climate, regulations, and available materials, which can greatly impact the project’s success.
Identifying Local Businesses
Locating local businesses specializing in picket fence installation involves proactive searching. Online directories, neighborhood forums, and recommendations from friends or neighbors can provide valuable leads. Consider checking local business listings on websites like Yelp, Google My Business, and Angie’s List for reviews and ratings. These resources often provide a glimpse into the quality of work and customer satisfaction. Visiting local home improvement stores or hardware suppliers can also lead you to contractors they recommend.
Contacting Local Fence Installers
A well-structured contact method can streamline the process of finding the right fit. A template for contacting local fence installers should include your project details, desired style, and budget. Providing specifics such as the dimensions of the fence, the type of wood you prefer, and the desired finish will allow installers to give accurate quotes. This information should be conveyed in a clear and concise manner. Example:
| Contact Information | Project Details |
|---|---|
| Name of Contractor | Dimensions of fence: 10 feet x 6 feet Type of wood: Cedar Desired finish: Stained |
| Phone Number | Number of fence posts: 8 Type of fence pickets: 4-inch |
| Email Address | Budget: $2,500 – $3,500 |
Factors to Consider When Choosing a Contractor
Several factors influence the selection of a contractor. Experience, licensing, insurance, and references are essential elements to consider. A contractor with a proven track record of successful projects is likely to provide a higher level of service. Ensure the contractor is licensed and insured to protect you from potential liabilities. Positive reviews from past clients, and readily available references, are valuable indicators of quality and reliability.
Getting Multiple Quotes and Comparing Services
Obtaining multiple quotes is essential for comparing services. Comparing quotes from various contractors allows for a thorough assessment of pricing and service quality. This process enables you to identify potential cost savings and ensure you’re getting the best value for your investment. It’s important to compare not just the price but also the quality of materials, the duration of the project, and the overall service offered. A contractor who provides a comprehensive service package, including post installation and material delivery, is often more convenient.
Questions to Ask Potential Contractors
A well-prepared list of questions can help you assess potential contractors effectively. The questions should address project specifics, pricing, timeline, and the contractor’s experience. Consider inquiring about their experience with similar projects, their approach to post installation, and their warranty policies. Examples of questions include:
- What is your experience with installing picket fences similar to mine?
- What is your pricing structure, and are there any hidden costs?
- What is your timeline for completing the project?
- What are your warranty policies for materials and labor?
- Do you provide references from previous clients?
Ultimate Conclusion
In conclusion, installing a picket fence is a significant undertaking that requires careful planning and execution. This guide has provided a detailed overview of the process, encompassing everything from material selection and site preparation to installation techniques and maintenance. By following the steps Artikeld here, homeowners can achieve a beautiful and durable picket fence that enhances their property’s value and appeal. Remember to consider your budget and local resources when selecting a contractor. Good luck with your project!